Table of Contents
Ripple Effect
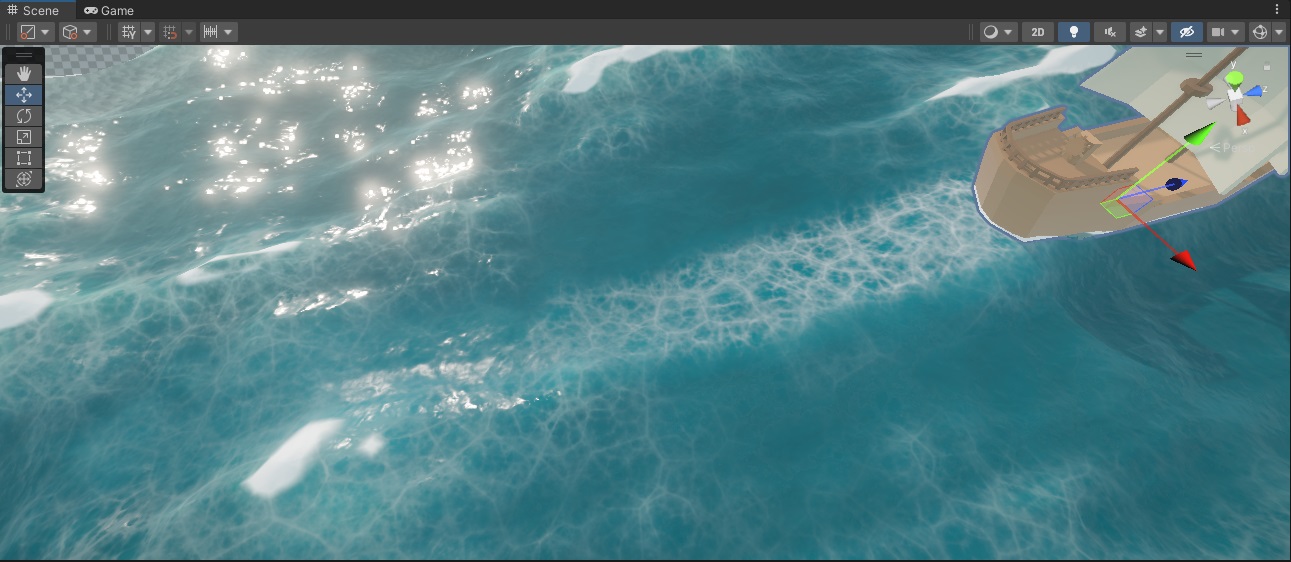
Ripple effect is quite advanced and computation heavy feature.
You may want to be careful with its quality and maybe even expose it to game settings.
Ripple consists of few parts:
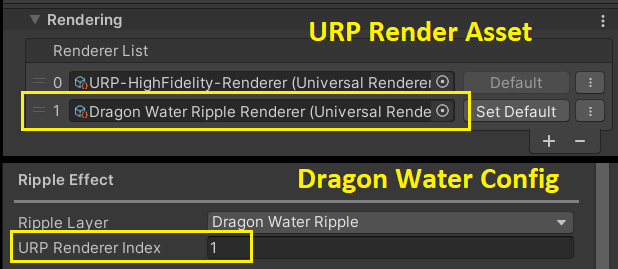
Configure URP Renderer
In most cases you will want to use separate, simpler renderer for ripple.
In asset files you will find predefined Dragon Water Ripple Renderer.
Assign it to every URP render pipeline asset at same index and configure it in Dragon Water Config window.
Create Projector
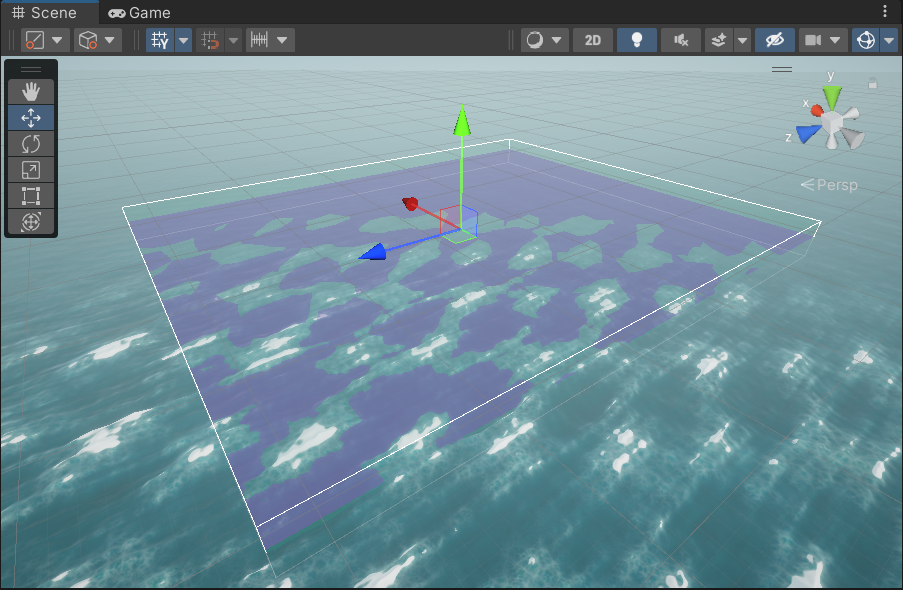
Projector internally works as separate camera used to draw casters at specific height level for water surfaces and wave profiles.
You can have many of them on scene, but you shouldn't - have as few of them as possible and reuse them between water surfaces when possible to save performance.
- Create empty game object
- Add
WaterRippleProjectorcomponent
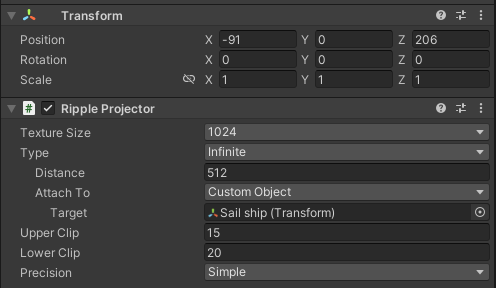
Make sure its height position (Y component) is equal to your water surface level (usually 0 for oceans).
This height level will be drawn as purple plane on scene gizmo.
Projector placed too high or too low will make ripple appear too soon or too late. If you have multiple water surfaces at same height level - make and reuse one projector for this level.
Also, make sure its rotation is always default, zero-rotation in global space, otherwsie it will not work properly.
- Texture Size - quality of ripple, be careful with it.
- Type - type of projector:
- Local - projector stays where it is, you simply define width and height of it.
- Infinite - projector of square shape attached to camera (you can override this behaviour with Attach To option), you will use it mostly for oceans and other large spaces
- Attach To - in infinite mode by default it's attached to main camera and follows it's transform. You can change it to e.g. your character/ship if you use 3rd person view.
- Lower & Upper Clip - define frustum size for virtual camera that will be used to render ripple casters. It's displayed as white wireframe on scene gizmo. Configure it so frustum is large enough to contain the highest wave you are going to have.
- Precision - precision mode that affects both, performance and visual quality:
- High - takes wave height into consideration by sampling offset texture multiple times. Gives best precision but with highest performance cost.
- Simple - includes wave height, but does only 1 sample comparing to High mode. Slighlty worse precision. Best compromise between performance and quality. Works best with medium waves and with low steepness.
- Flat - doesn't include any waves - it simply uses water surface level. Gives best performance. Recommended for mobile and everywhere where your waves are very subtle (you can approximate surface to flat).
- Scan Interval - time in seconds between scanning for new casters inside projector. You can always disable it by putting high value and do it manually throguh script by calling
ScanCasters()function.
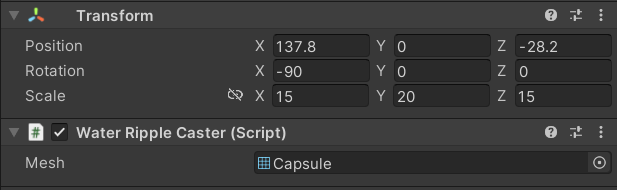
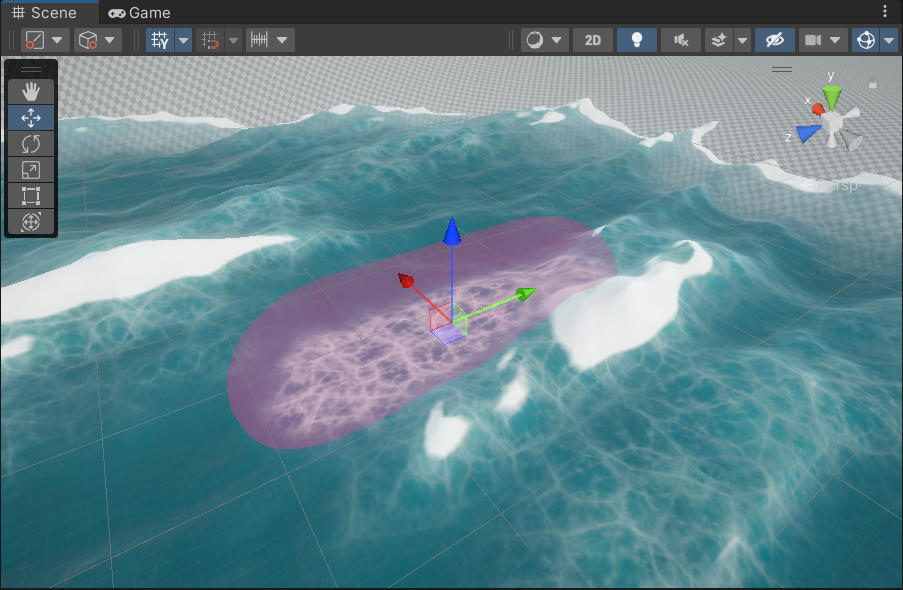
Create Caster
Casters are like mesh renderers but only for projector cameras.
You create them in similar way to Cutout Volumes.
Method #1:
- Select any 3D object.
- Click three dots on MeshRenderer component to open its' context menu
- Use Create Ripple Caster option.
Method #2:
- Create empty game object
- Add
WaterRippleCastercomponent - Assign mesh - it can be any mesh, but it's recommended to use separate, simple low-poly mesh
Configure Wave Profile
Technically ripple is a linear, float variable from 0 to 1.
0 means no ripple and 1 means full riple (caster geometry at full depth).
Because you can reuse projector between different surfaces with different wave profiles, you can configure how ripple is simulated in each wave preset (see Wave Profile).
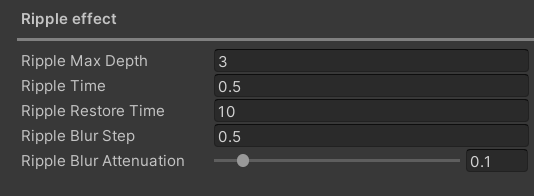
- Max Depth - maximum depth for casters geometry when ripple becomes full (1).
- Time - time needed to go from 0 to 1 (caster starts colliding, you want it to be fast).
- Restore Time - time needed to go from 1 to 0 (caster stops colliding, you want it to be slow).
- Blur Step & Attenuation - physically, ripple at point XY will also make nearby area to go down too. With these two values you can configure it. Attenuation means how weaker ripple will be every Step distance from ripple source point.
Configure Material Profile
Similar to wave profiles, you can configure how ripple is actually displayed visually on surface in Material Profile.
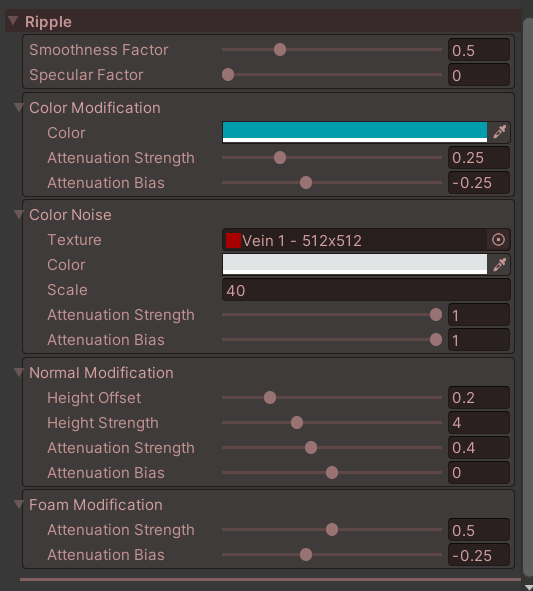
As we already know, ripple is a single float variable within 0-1 range.
It's used as input for every section here in material profile.
- Smoothness & Specular Factor - how much ripple value should affect smoothness and specular.
- Color Modification - override output base color depending on ripple value.
- Attenuation - configure how ripple affect this module. Strength is a general multiplier and Bias works like power - higher value means effect will become weaker shorter and vice versa.
- Color Noise - apply extra global, texture-based color noise.
- Texture - must be grayscale R-channel texture.
- Normal Modification - adds extra normal on ripple edges and flats inner area out.
- Height Offset & Strength - configure how normal-from-height is acquired from ripple simulation texture.
- Foam Modification - attenuate foam in rippled area.
Assign Projector to Surface
Final step is to actually make your ripple visible.
Select your water surface, enable ripple and assign projector.
One surface can use only one ripple projector, but you can (and you should) reuse one projector between multiple surfaces as long as they are on similar height level in world-space coordinates.
